 |
AUTOCAD Excel to AutoCAD - Data Link Manager |
_If you ever find yourself spending huge amounts of time updating drawing transmittals/registers then having to update project title cover sheets then this will save you time. In our office, we have a drawing transmittal/register in excel but also have an AutoCAD paperspace layout showing all the drawings in the project also. It only seems logical to need to only update this information once in one place. To do this, we first set up our excel drawing transmittal
I have included an Excel Spreadsheet for this Tutorial you can download here and an AutoCAD file here
Save this file to your hard drive.
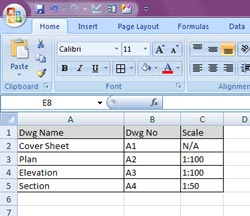
Open the file in Excel and you should now have a file that looks something similar to Fig.1 I know this table is basic but it will serve our purposes for this tutorial.
|
|
|---|
Now open AutoCAD and open the drawing you downloaded (or use your own) If you are using the downloaded AutoCAD drawing file you will be in paperspace (Fig.2)
|
|
|---|

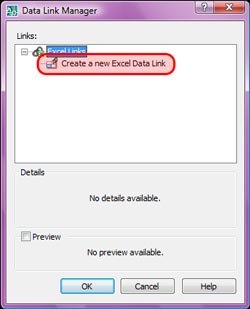
Goto your menu bar: Click on TOOLS > Data Links > Data Link Manager Once you click on the Create a new Excel Data Link you are prompted for a name. You can call this anything you like but for now just name it DwgReg (Fig.4) |
|
|---|

| The next window to pop up is asking for an excel file to link to. Click on the three ... (Shown red in Fig.5) and goto where you saved the Excel file you downloaded. Select the file and click OK. | 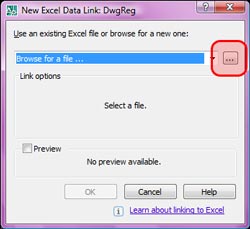 Fig.5 |
|---|
Now in the next window that appears, select Link to Range. In the input box that says <Example: , type in A1:D5 |
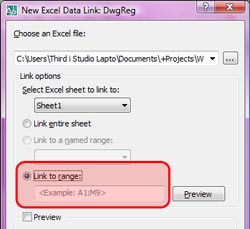 Fig.6 |
|---|
To insert a table into AutoCAD, goto DRAW > Table from the menu bar. The Insert Table window appears. Once selected Click OK. You are now prompted to select the insertion point for the table. Place it anywhere you like. If you now change something in the Excel file and click save, This tutorial was a basic look at the table data link, there is much more that can be done in terms of formatting your tables. |
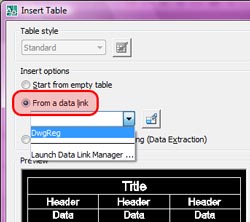 Fig.7 |
|---|